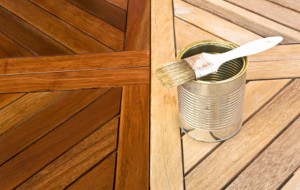
Do-It Yourself: Deck Staining
 Most deck owners know that one of the keys to keeping their decks looking good is staining it every few years. However, while deck staining is a process that most homeowners are capable of doing themselves, finding the time to do it can be difficult. With the right approach and the right products, you can get everything done in just one day and spend the rest of the year enjoying your newly stained deck.
By perfecting your process, you can take staining from something that you dread to a simple one-day process. Here’s a step-by-step guide to getting your deck looking good in a day:
First, choose the look you want to project on your deck. Do you want a clear, semi-transparent or solid finish? Do some research to see which type of wood stain would look best on your deck. Clear finish generally looks better on newer wood, while a solid finish might be used on older decks to hide imperfections. If you are looking for the solution that will allow you to accomplish your project in one day, you’ll need to choose a product which can be applied within a few hours of cleaning the surface.
Always know your deck’s square footage before heading to the store to buy stain. Don’t estimate, because nothing is more frustrating than having to stop your project because you ran out of stain. Make sure you also have all the necessary supplies before leaving the store.
Before the day you stain, examine your deck to see if there are any necessary repairs that should be done. If your deck is squeaky, it’s likely due to loose nails. Replace loose or missing nails with deck screws, as hammering a nail into the same spot won’t fix the problem.
Once you have all the supplies, check the weather report and pick a day that’s good for staining. Temperatures should range between 50 and 90 F, and there should be at least 48 hours without a threat of rain.
Remove everything from your deck and use a wood cleaner to clean and prepare your surface. Decks that are in good condition can simply be cleaned before staining. But if your deck is peeling, has mildew growth or experiencing other surface irregularities, it’s best to strip it before staining.
If you’re using a one coat waterproofing finish, you can begin staining a few hours after you prepped the surface. Quick tip: If you’re using multiple cans of stain, mix them together for color consistency and continue to stir throughout the process.
Work the entire length of each board and make sure you are applying evenly throughout. If you are working on a vertical surface, start at the bottom and work up to avoid streaking.
Take your time to do a thorough job, but make sure you use only as much stain as the directions call for. Especially when working with oil products, using too much can ruin the look of your deck.
It’s important to note that for larger decks, or decks that pose unique challenges such as numerous hard-to-reach areas, the process could take longer than a day. But by following these steps, you’ll ensure that your deck will be looking great in less time and with less hassle.
Once you’ve finished staining, dispose of any extra stain or cleaner as directed by the instructions on the can and let the deck dry for the prescribed amount of time before walking or placing items on it. In no time, you’ll be enjoying your deck for the seasons to come.
Source: www.flood.com.


Sorry, the comment form is closed at this time.